Getting started
The first time an owner signs in, Greetfolk opens a setup of nine short steps. Each step is one of the dashboard's own pages, so anything you enter here you can change later from the menu.
The screenshots show a demo business with made-up bookings and chats.
1. Find your way around the setup
The top of each step says Step 1 of 9 and lists every step as a link, so you can jump to any of them. Back and Next move one step at a time. If you leave, the menu starts with Finish setup, which opens the step you were on.

2. Choose your business type
The type sets the words your dashboard and website use, the starter services you get and the website templates you can choose from. If your business came from a listing you claimed, the type is already set, and Greetfolk changes it for you if it is wrong.
3. Add your details and location
Enter the business's name and contact details, then its main branch with the address and phone. Clients see these on your website. You can add more branches later from Branches.
4. Set your opening hours
Give each day its opening hours, or leave a day without hours when you are closed. Online booking only offers times inside these hours.
5. Check your services and prices
The list starts with typical services and prices for your type. Open a service to change its price or remove it, then approve the rest. Your website can't be published until every price is approved.
6. Add the people clients book
Add each person clients can book. A new person opens on their own page, where you set their weekly hours and photo, and Back to setup returns you to the step. Online booking needs at least one person with weekly hours by appointment.
7. Add a logo and photos
Upload your logo, a cover photo and any gallery photos. Without your own photos the website shows sample ones in some places.
8. Pick the website look
Choose a template for your home page. You can change the template, the text of each section and the theme later under Website.
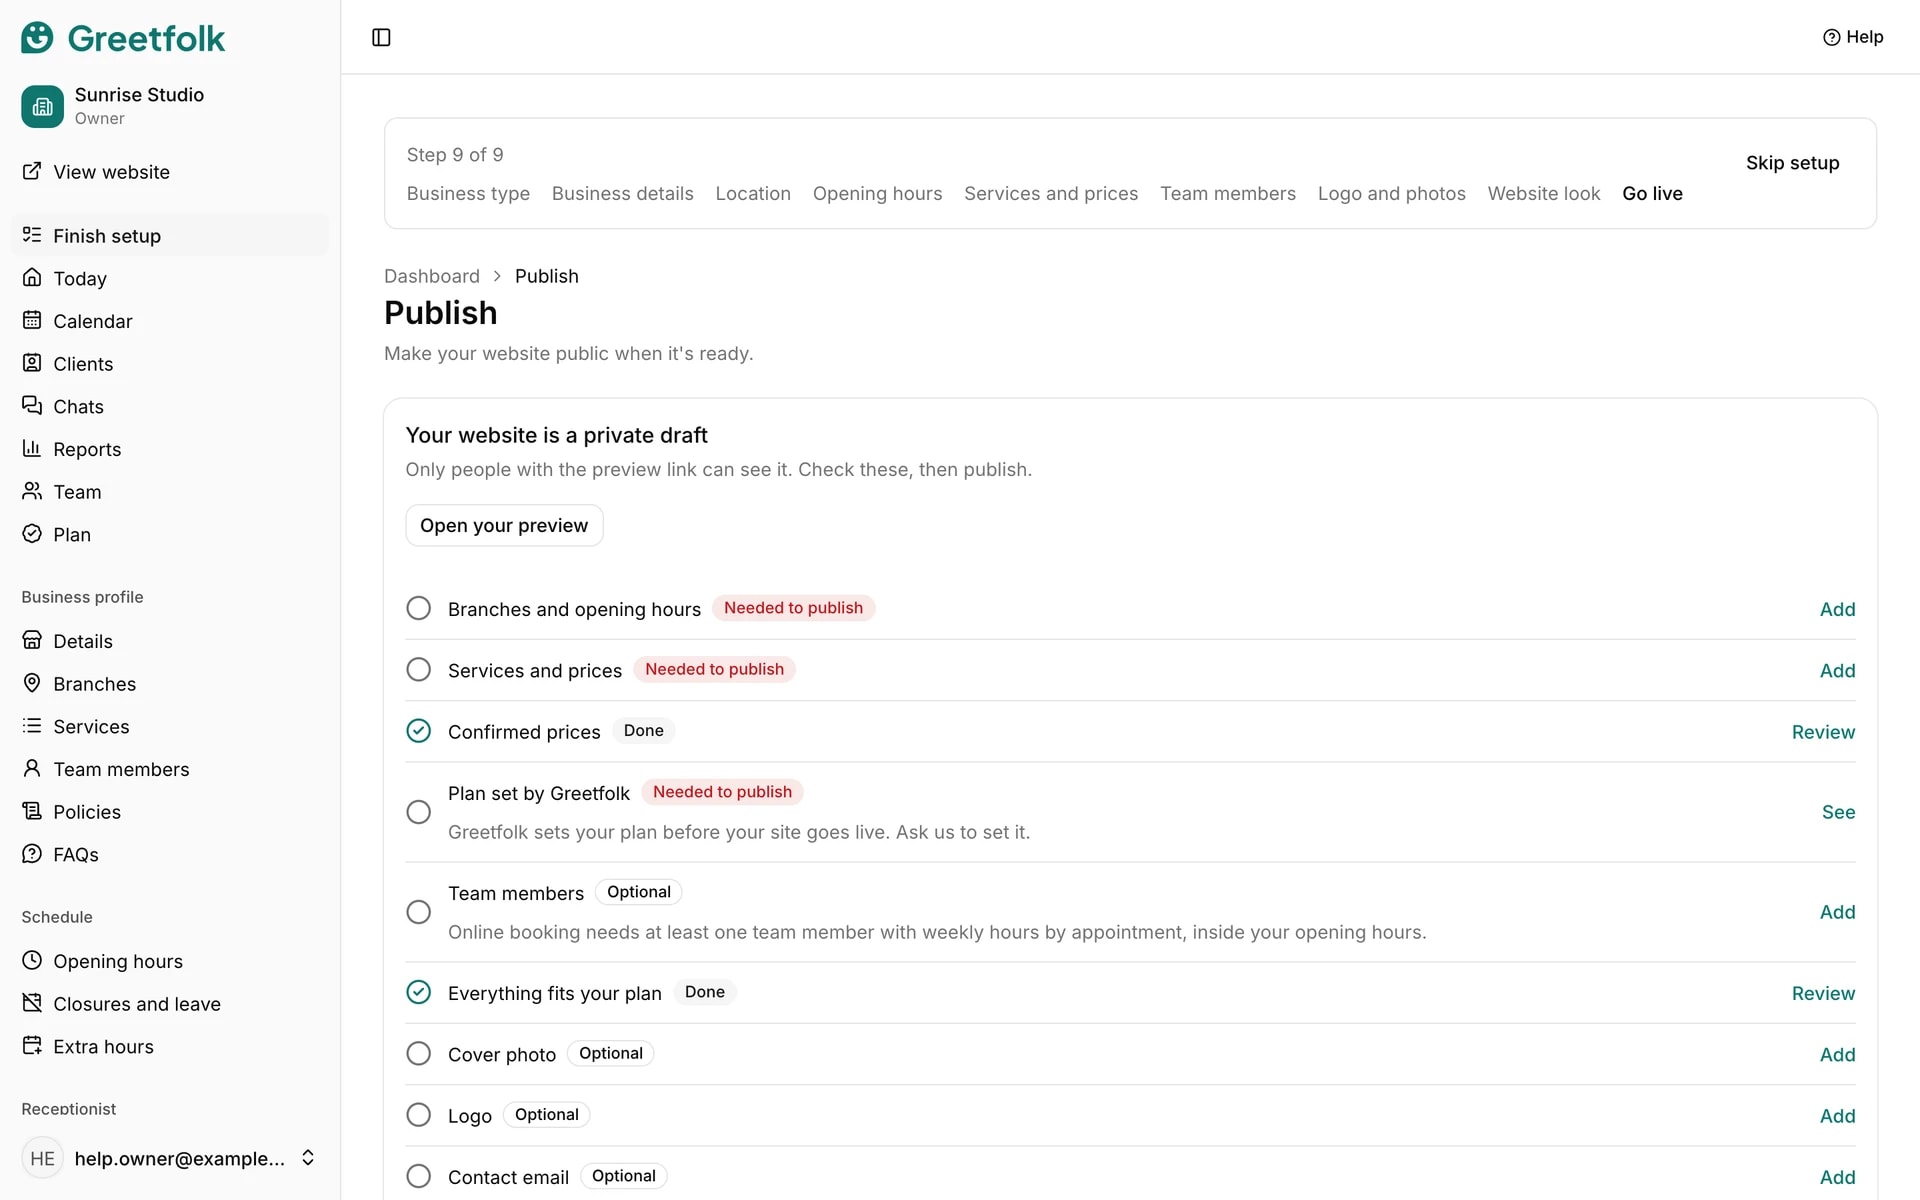
9. Go live
The last step is the Publish page: it lists what is still needed and has the Publish website button. Publishing finishes the setup and opens Today. If you are not ready, choose Finish setup and publish later from the menu.
10. Skip the setup
Skip setup closes the steps for good. Nothing is lost: every step's page stays in the menu, and the steps simply don't show again.